FAQs
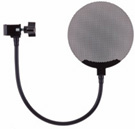
When recording vocals up close, a pop filter will be beneficial in protecting against plosives – bursts of unwanted energy generated by the letters b, p, and t. These plosives can overwhelm various stages of the signal path, from microphone through preamp, compressor and recorder. The best way to get rid of them is to filter them out at the source, before the microphone. Traditionally, a fine mesh stretched over a wire frame has been used, but better results are being achieved with all metal pop filters, like the Royer Labs PS-101 (shown below).
Pop filters are also useful in protecting the diaphragm against saliva, which is not healthy for condenser microphones (see #8 below – Humidity)
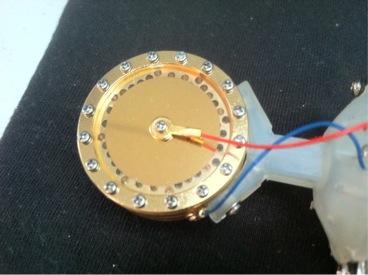
This is how your capsule should look:
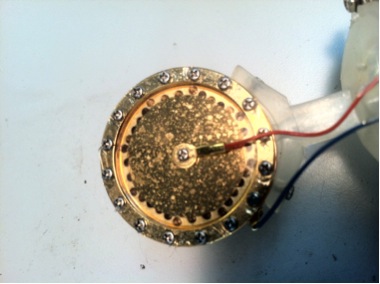
Not like this:
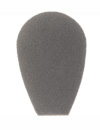
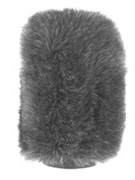
Wind Screens are actually designed for outdoor use. They are usually designed out of thick foam or an artificial fur. They are great problem solvers but do reduce frequency response so they are only recommended when needed, not as a substitute for a quality pop filter. Examples shown: Royer Labs WS-58 foam windscreen (left) and WS-12 windscreen (right)
The MA-200, MA-300, MA-100 and MA-100SP come with their own external power supply and do not require phantom power. Phantom power will not harm these microphones in any way.
The MA-301fet, MA-201fet and MA-101fet do require phantom power.
All condenser microphones require voltage to operate. Many solid-state mics receive a 48-volt supply through the microphone cable, provided by the recording console or mic preamp.
A note about 48v phantom power: Some less than forthcoming audio manufacturers may claim to be providing 48v, but are actually not getting anywhere near 48v when mics are actually plugged in. Any condenser mic receiving less than 40v will not be giving you the performance it is specified to produce. Fortunately, the MA-201fet and MA-10fet are designed to deliver full performance with less than ideal phantom power, but this is not true of all condenser mics or active ribbon mics.
David Royer is known for ribbon mics through his work with Royer Labs, but he’s been involved in condenser mics and other outboard gear for many years. Mojave Audio was created to produce David’s non-ribbon designs. By the way, David started Mojave Audio in 1985 and even his earliest ribbon mics (including his prototype R-121s) say Mojave Audio on them!
All types of commercial microphones (condenser, dynamic and ribbon) work on the same basic principle – the displacement of a diaphragm (or with ribbon microphones, a long, narrow ribbon) by a sound wave is made to produce a corresponding voltage swing. Moving coil (dynamic) and ribbon microphones are electromagnetic devices and in their simplest forms can produce useable audio signals without any additional electronic help.
With a condenser microphone, the microphone capsule consists of a very thin, flexible diaphragm which is spaced a minute distance in front of a rigid, insulated electrode referred to as a backplate. This diaphragm and backplate form the two plates of a capacitor, which, in the absence of a sound wave, will have a very small but definite capacitance. However, when a sound wave displaces the diaphragm, the capacitance will either be increased above or reduced below the “resting” value; depending upon whether the sound wave pushes the diaphragm toward the backplate or causes it to bow out away from the backplate.
Although this variable capacitance will not generate an audio signal on its own, it can be connected into a suitable electrical circuit so that the capacitance change will produce a corresponding voltage change in the external circuit, as illustrated in the figure below:
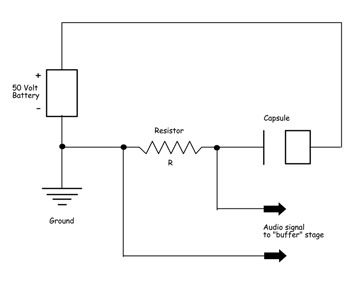
In the figure, the 50 volt battery’s positive terminal connects to the “backplate” of the microphone capsule and the negative terminal is grounded. The capsule’s diaphragm is also grounded through the resistor R. In this case, the capacitance will charge in a time determined by the RC time constant (T in seconds = C in FARADS multiplied by R in OHMS) and once the capacitor is charged, the backplate would be 50 volts above ground and the diaphragm would be at ground potential. Any change in the capacitance, though, will result in a voltage swing across R, which may serve as both the OUTPUT load for the capsule and as the INPUT load on a following “buffer” amplifier.
With practical capacitor microphone capsules, the capacitance is very small and R must be a resistor with a resistance of several hundred million ohms in order for the output voltage to correspond to the diaphragm displacement throughout the audio range. Also, the microphone capsule and R must have a “buffer” amplifier within an inch of them, to avoid excessive signal loss and noise pickup and this “buffer” stage must have an extremely high input impedance; a vacuum tube or a FET must be used on account of the impedance of the signal source.
In commercial capacitor microphones, the battery in the figure is eliminated and the voltage is taken from the DC supply voltage that is sent down the cable to operate the capsule and the buffer amplifier – “phantom” power in the case of transistorized microphones or voltages furnished by a dedicated power supply, in the case of most tube microphone designs.
Always store your Mojave Microphone in its case when not in use. It’s important to keep dust from accumulating on the microphone, so it’s a good idea to wipe it down after use with a soft cloth. If stronger cleaning is necessary, apply a non-abrasive household cleaner to the cloth and then wipe the microphone. Never spray anything into the capsule!
The MA-200 and MA-201fet have a Cardioid polar pattern. The MA-100 and MA-100SP have interchangeable cardioid and omnidirectional capsules. The MA-300 has a continuously variable pattern selector and the MA-301fet has three selectable patterns: omni, cardioid and figure-of-eight.
Microphones can be configured for any of three main polar patterns; Cardioid, Omni, and Bi-directional.
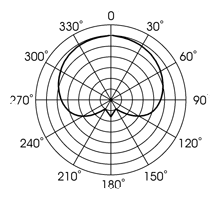 Cardioid mics pickup sound on one side of the capsule in a heart-shaped pattern (hence the name Cardioid) and reject sound from the rear and sides. This allows engineers to isolate a sound source from its surrounding environment, such as other instruments or ambient noise. (See below)
Microphones can be configured for any of three main polar patterns; Cardioid, Omni, and Bi-directional. Some microphones also allow for settings in between these patterns.
Omni-directional mics pick up sound equally from all directions, which is especially useful for capturing ambiance or a large sound field. This can be a good or bad choice of pattern to use, depending on the quality of the environment the mic is being used in. Omni-directional mics are very popular for recording classical music.
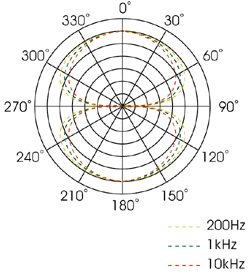 Bi-directional (or figure-8) mics capture sound equally from the front and back of the mic, while rejecting sound from the sides. Most ribbon microphones are bi-directional. (See below)
Extreme temperatures and high humidity can negatively affect the performance of a condenser microphone. Humidity problems generally manifest themselves as crackling and/or a loss in frequency response. Fortunately, most studios are air conditioned, which removes humidity from the air. Never store your microphones in a damp environment or allow a singer to put a humidifier in the vocal booth! Always keep a desiccant (small bag of silica) in the microphone case and be sure to maintain the dryness of the desiccant as required. If your condenser microphone has been in an extreme temperature (cold or hot), it’s always good to let it acclimate to room temperature before applying power.
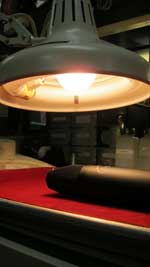
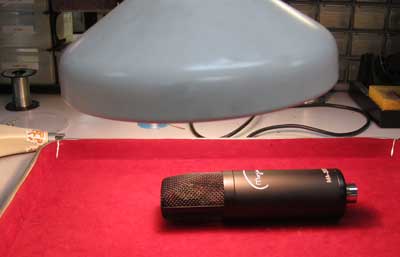
Many classic studios would keep their condenser microphones in a hot box – a box with a light bulb generating a low level heat (like an incubator). If you are having humidity related problems, try putting your microphone near the heat of a light bulb for half an hour. Never use a blow dryer on your condenser microphone!
Proximity Effect is a boost in the upper bass frequencies that increases with the closeness (proximity) of the sound source. Microphones with cardioid and bi-directional polar patterns exhibit this effect much more than omnidirectional microphones. Proximity effect can be used to add fullness to a track, such as vocals, where a few inches on or off the microphone can make a big difference. Proximity effect can also cause unwanted boominess, for example, on acoustic guitar, so proper mic positioning is important. Placing the microphone too close to the instrument, especially the sound hole, will result in an overly bassy sound. Many engineers find the sweet spot to be 9-12″ off the twelfth fret or where the neck meets the body. Much of today’s modern rock takes advantage of proximity effect when miking guitar amplifiers by putting a dynamic mic and/or a ribbon mic right up on the cone of the speaker, creating a ‘larger than life’ sound.
Shock mounts do two things: a) protect the capsule from physical damage and b) keep the microphone from generating large low frequency spikes or rumbling caused by vibrations. There are many low frequency sources in our world: air conditioning, vehicles passing by, doors closing, a musicians tapping foot. A quality shock mount prevents much of this energy from ever reaching the microphone.